Thursday, April 11, 2013

Review: 4479 TIE Bomber


Set ID: 4479 TIE Bomber
Number of Pieces: 230
Year of Release: 2003
Minifigs: 1
Purchased Price: SGD70

Last year, to keep my kids occupied during their school break, I allowed them to help me do some maintenance of my rented LEGO storage space and as a reward, to choose a set from the collection to build. My son's wide eyes showed signs of disbelief when I proposed this but very soon after, the wideness diminished as I stated my conditions of choice: (1) No UCS sets (2) Something that can be managed in an hour or so and (3) I have to agree. The last condition literally wiped the smile off his face. Anyways, this was the set he chose.


I have since dismantled the set and rebuild it recently. So this review will be based on my rebuilding experience of this 10 year old set. It is only now that I realized that this is the ONLY TIE Bomber ever released (till now 2013). With too many TIE variants released over the years, it is easy to lose count of how many TIEs are there in my collection.

The scant cockpit
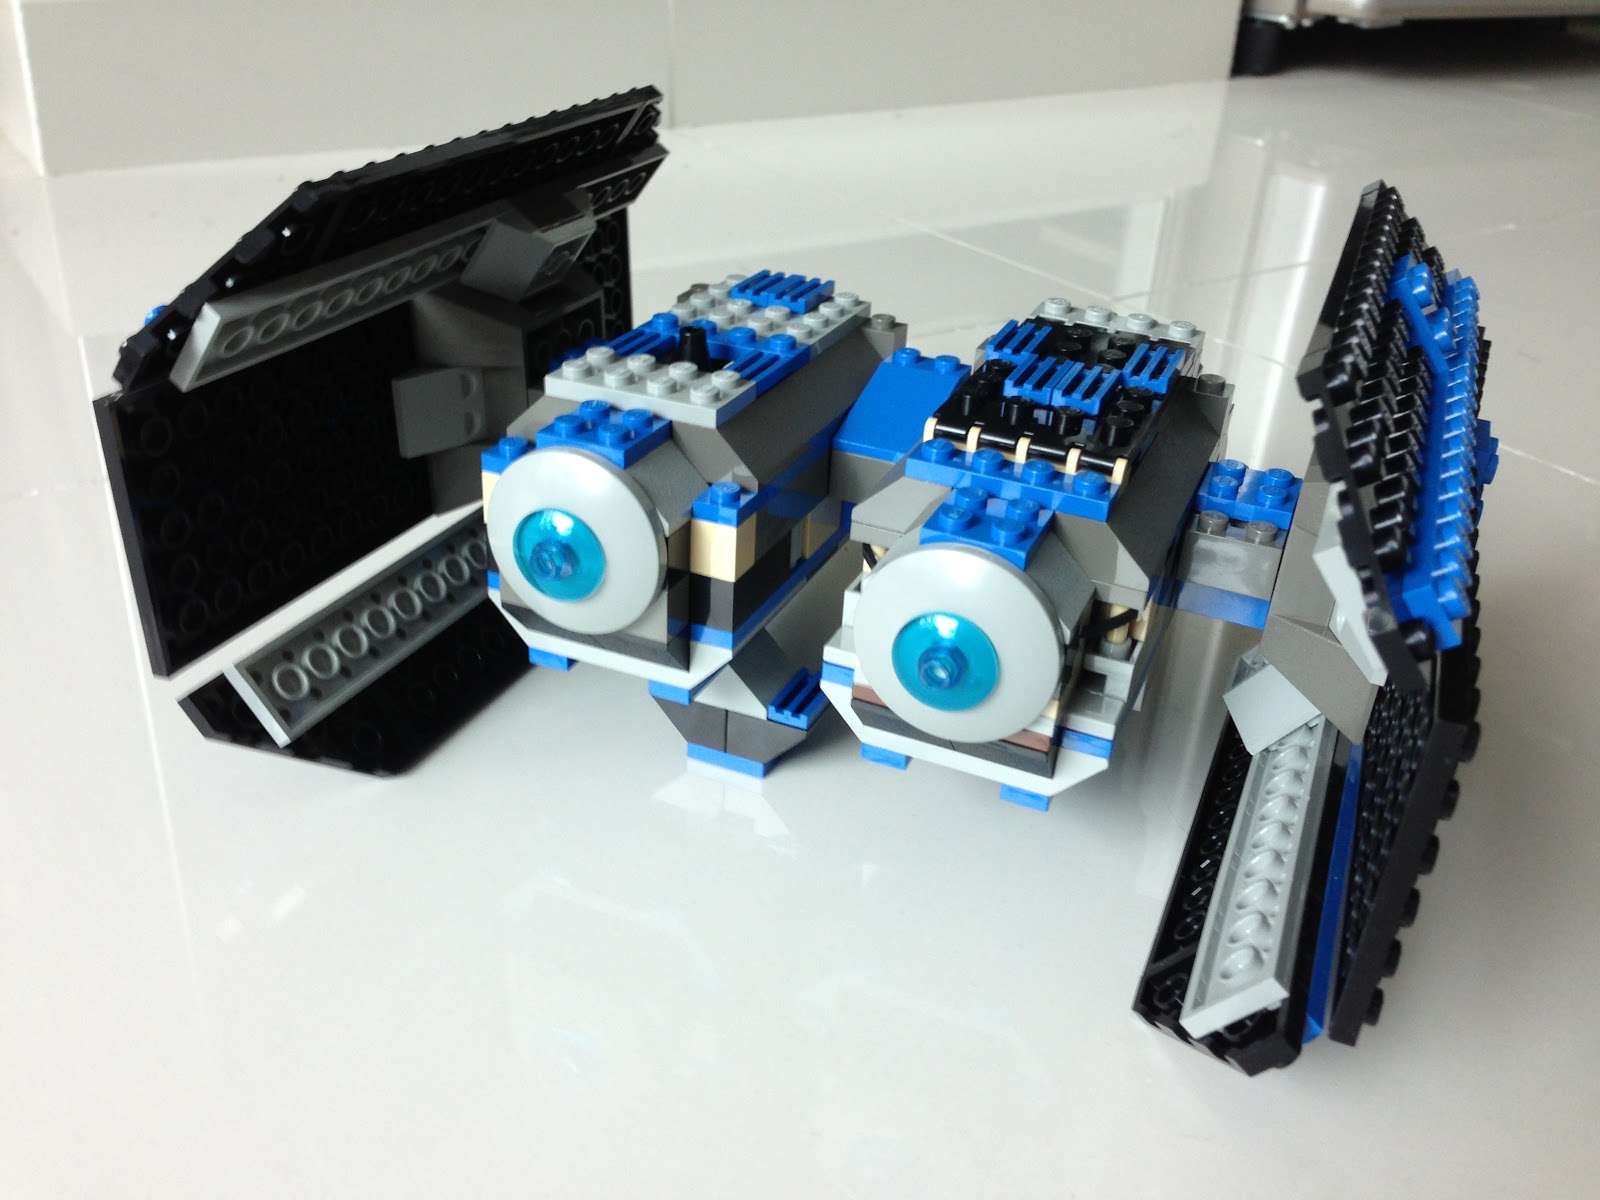
Not the best looking variant in the TIE family, the TIE Bomber consists of a cockpit pod and an ordnance pod, as well as the trademark TIE wings by its side. The pilot can access the cockpit via the front and it is quite disappointing to see that the entire cockpit is quite scantily designed. There are no control panels or joystick to keep the poor pilot occupied. Guess he will also need to master the use of force to fly this machine then. Behind the cockpit is the bomb chamber. The bombs are loaded via a hinged hatch on top of the cockpit pod and deployed via the bottom, by tugging the rear of the pod.


The ordnance pod is designed to house the entire spring action missile firing mechanism. As compared to those flick missiles that are introduced in recent years, this tops all of them in terms of firing power and SIZE! The exit of the missile pod is covered by two flaps, which are hardly adequate to stop the projectile of the exiting missiles.

The "target tracker"
And then there is this weird looking gadget that is found on the undercarriage of the ordnance pod. I have to admit I first thought it was a landing gear of sort, but it does look strangely our of place and unsymmetrical to be one. Flipping through some literature and a fair bit of research later, it turns out that it is actually the target tracking sensor.

It also turned out that the colour scheme of the LEGO version is quite a departure from the original. The former very much shrouded in black and blue, whilst the latter is primarily grey, which I find is nicer.

Building Experience

Rebuilding is never as easy as building it for the first time, for the bricks are not sorted by colours / shapes nor are they in sequential packages. But for 230 pieces, it doesn't really take long to put this together. Once again, the colours on the manual did mislead me a few times, especially with the shades of grey. As this was launched 10 years ago in 2003, the manual is also not designed with the additional brick inventory with each step.

The old school building manual
It was also quite easy to tell the age of this set during the building process. The overall design still exude a very "bricky" feel, partly due to the lack of variations of brick choices. I am looking at it with a pair of 2013 eyes so this lack-of-asthetic is rather apparent. But I guess 10 years ago, not many people will be complaining about this.

Rear View
The completed set did not feel very solid, with the wings flapping a little when you touch them. As I attempted to hold the TIE Bomber by the wing, it actually detached from the fuselage! This could be due to me building it for the second time, and therefore some parts are coming loose (but this should not happen to LEGO quality right?), or it could be attributed to simply bad design.

And then .... there are NO stickers!!!! All the designs on the bricks were printed and this is also another sign of age. If LEGO is going to re-launch this set again today, I bet my last dollar that there will be an accompanying sticker sheet. Where are those good old days?

Minifig

There is a lone minifig in this set, a very early version of a TIE pilot. He comes with a brown unprinted head piece inside a very detailed (by 2003 standards) helmet. There is only a very simple design printed on the front of the torso piece and the rest of the pilot are essentially, black.

Conclusion

Rewinding back 10 years ago, this set didn't really appeal to me. Moreover, I had already quite a number of TIE fighters in my collection then and this was not any better than any of those, in terms of design. Well, being a compulsive collector, I have to have this.

+ No stickers!
+ Big huge missile that really fires off! (Despite its weird proportion to the overall size of the TIE Bomber)

- Dated design, resulting in "blocky" feel
- Does not feel solid when completed. Some loose parts near the wing joints.
- Naked cockpit. Disappointing

Get this if you are an avid TIE lover, provided you are prepared to part with USD 50 (starting bid on ebay) for a new set on internet now. Psst ... some websites are classifying this set as vintage! How apt.

Wednesday, April 3, 2013

Review: 10227 UCS B-Wing Starfighter


Set ID: 10227 UCS B-Wing Starfighter
Number of Pieces: 1487
Year of Release: 2012
Minifigs: None
Purchased Price: About SGD 385

You need the following before you build this UCS set:

1) Money to buy a set. Or two, if you intend to keep one MISB.
2) Patience. Never rush building a UCS set. Appreciate the beauty of the product, the thoughts behind the design and the subtle details that can go unnoticed in such a big set.
3) Display space. UCS sets are never intended for play, which explains the display stand that comes with all of them. They are huge and space consuming, but good looking nonetheless.
4) Special liking for the unconventional-looking, or a strong affiliation to the B-Wing, which I don't
5) Compulsive LEGO Star Wars collector. Which I am.

Once all the above are in place, you are ready to slice open the tapes on the box and begin your construction. 

It has been some months since I last build a UCS set (the last one being the beautiful R2D2) and I have been itching to build this for a while. Despite having other large UCS sets in my possession, my decision to open this up was based on its recency (and therefore less valuable) and the fact that it is not one of my favourite Star Wars vehicles. 

B-wing? t-wing?
Two other B-wings were released prior to this UCS version. In 2000, the very simply-designed (almost skeletal) 7180 was launched and 6 years after, the 6208 was proven to be a much improved release. For the uninitiated, the name of this starfighter was derived from its unique shape when you collapse all the wings together, forming a letter "b". Yes, not the capital "B". Honestly, I still think this is more of a "t"-wing rather than "b". Anyways, that's just my opinion.

The arsenal of this ship is phenomenal. There are no less than 10 laser / cannon blasters found on the B-Wing. I wonder how the pilot can actually make a judgement of which one to use when engaged in a dogfight. Unlike a conventional flying machine, the cockpit of the B-Wing remains level while flying and the wing(s) will rotate around it to maneuver through space. My engineering rationale is quietly creeping into the picture again ...
  
Check out the gaps adjacent to the fuselage
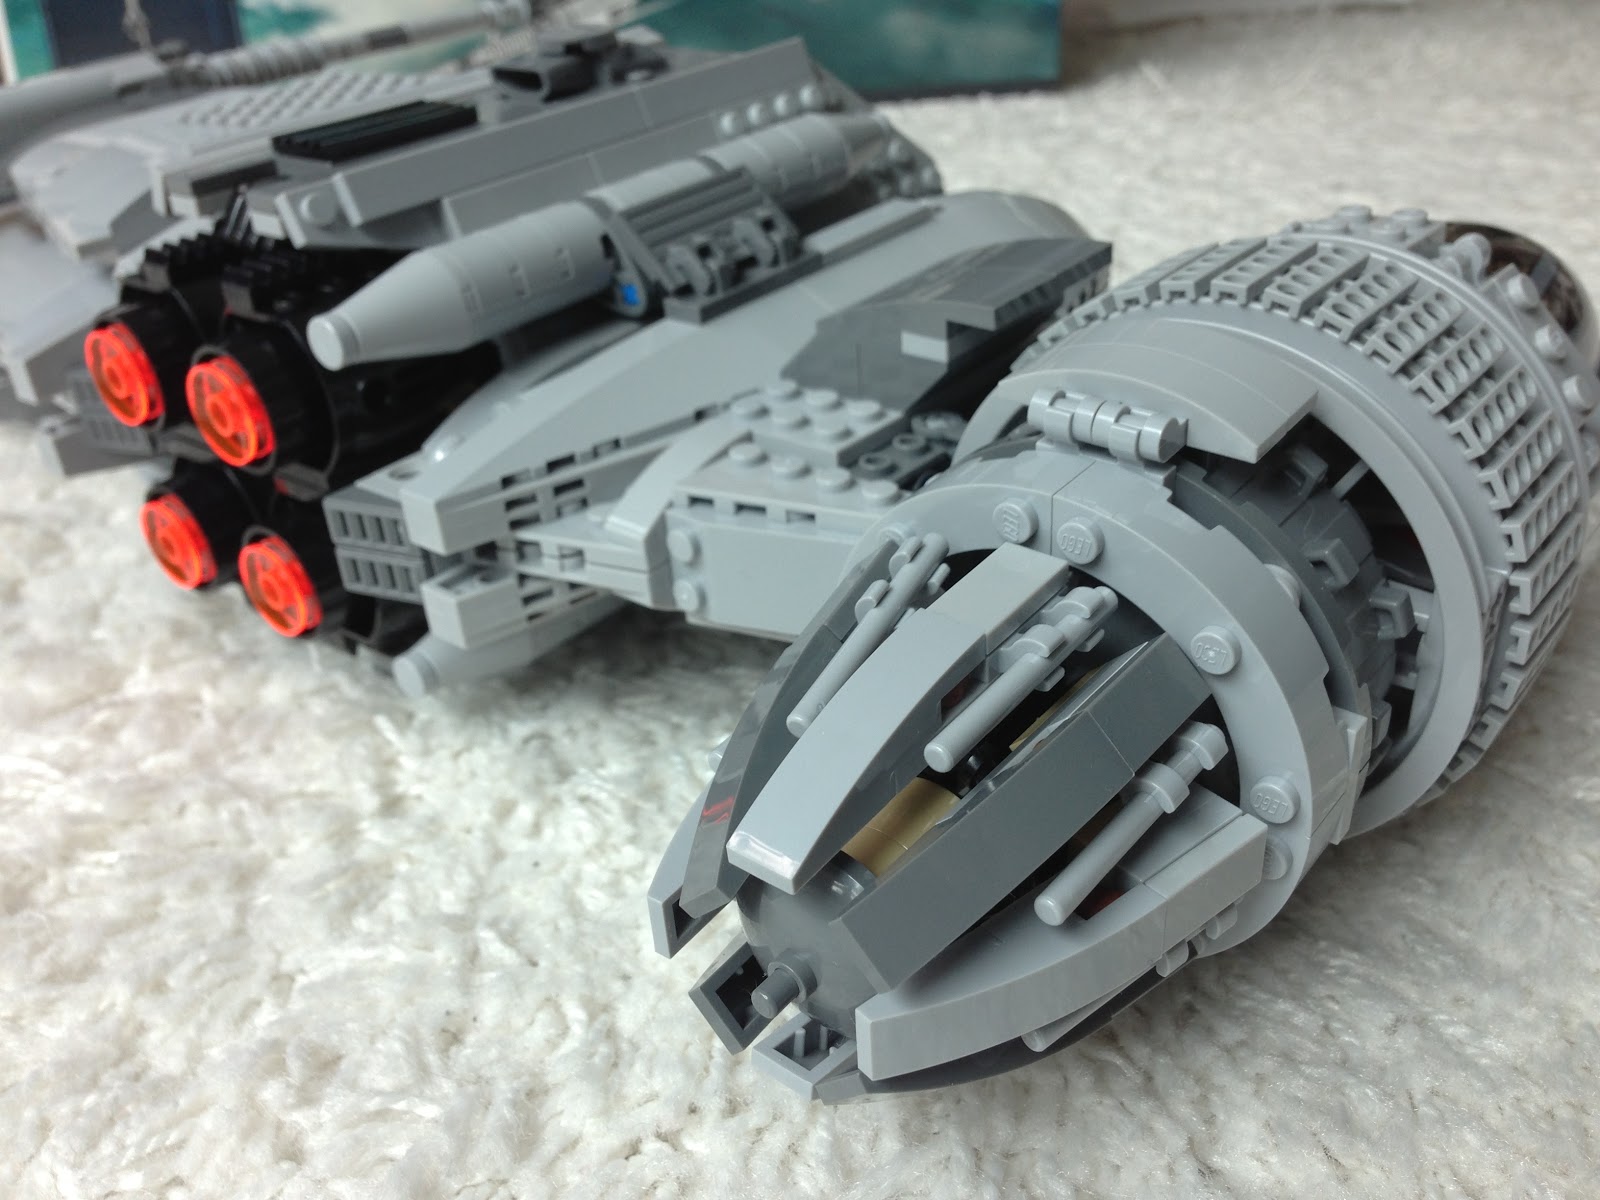
The fuselage / engine unit of the B-Wing is pivotal (pun intended) to the success of the design. It houses the huge air intake valves in the front as well as the four exhaust outlets at its rear. It was built by putting two symmetrical parts solidly together. It was so solid that nothing came apart when I cartwheeled it for a few rotations on the floor.

Adjacent to the fuselage are two sausage-like parts that I presume are the fuel tanks, not unlike those found on the space shuttles. My research on a schematic diagram of the B-wing did not reveal the identity of these mysterious parts. Anyways, I am bringing this up because they were surprisingly, and disappointingly, badly designed. Similar to many other parts in this B-wing, these tanks were put together by two symmetrical parts. However, without having to closely examine it, you will be able to see the wide gaps between the two parts, especially those found at the tapering ends. For some reasons that I cannot comprehend, the two symmetrical parts seemed to warp and arch away from each other, resulting in this unsightly gaps. For a brand which spells perfection and quality, hmmm, I beg to differ.   

The completed model sits on the custom made display stand at a 45 degree angle. I like this pose as it gives you to feeling of the starfighter in flight. However, unlike most of the other UCS sets, the model does not have a dedicated slot where the display stand can fit it. Without that, it sits precariously on the display stand, performing a delicate, yet amazing, balancing act. This is not to say that it wobbles from side to side undisturbed. In fact, due to its sheer weight, the center of gravity is very close to the tip of the display stand, making it rest stably. However, in the process of moving the model for phototaking, I encountered my fair share of toppling the model over, resulting in a few repair work to be performed.

Don't get me wrong. This is a rather solid model when completed. The best way to hold it up is by the fixed wing, which to me, is the most well built part of this B-Wing. Despite its length, the fixed wing does not feel slender as it was put together by combining two symmetrical pieces back-to-back. Having said that, there are also many other smaller parts that do come off easily if you accidentally touch it, especially those near the laser blasters.

Cock up at the cockpit

My biggest gripe of this set must be the cockpit unit. The complaint list is quite long:

1) The cockpit canopy does not open up easily. It can only do so if you remove a flap above it that is holding it in place. Fair enough, the set is not meant to open up for play time often but this is a really troublesome design.
2) The cockpit does not rotate back to level easily. This can be due to the more than necessary tightness of the rotating mechanism or that the base of the cockpit is not heavy enough to ensure that regardless of the position, the cockpit will self rotate to its original position. As this is one of the key features of a B-wing, I am rather disappointed that the designer did not get this right. (I prefer not to blame the builder)
3) The rear of the cockpit unit is flimsy. The bricks used to form the tapering design of the rear kept coming off with the slightest touch.
4) The track in the middle of the cockpit unit doesn't seem to fit well despite all my adjustments. They were quite a pain to put together too. 36 pieces! Seriously?

Building experience

I do like the box design. Not the art work (although it is not too bad), but the way which the box is designed to open. In many other LEGO sets, you will have to really rip the box up along the perforated lines in order to access the content. For this set  (as well as the UCS R2D2), all you need to do is to break 2 seals without having to damage the box. LEGO, please make this into a standard box design if possible. Thank you!

The box is big. Huge. But knowing how LEGO has the tendency to overkill the box size, I opened it with much sceptism, knowing that there are only 1487 bricks to greet me. Sure enough, the box was half filled with bricks, the half filled with ... air. As a collector, I do keep all the boxes in its original shape (and hopefully condition), and the size of such big sets certainly does not go down well with my lack of storage space.


The entire building process was broken down into 10 parts. Some parts do require more than a pack of bricks, which was why there were more than 10 packets of bricks in this set. As can be expected of a symmetrically designed starfighter, there were a fair bit of repeated steps in the construction of the wings. This was especially necessary, given that the designer was trying to eliminate the exposed bottom side of the bricks which can be unsightly. As with any UCS or large sets, there were plenty of extra bricks / studs left after the construction. 

There were many Technics parts and unique brick pieces which I have never seen before in any other sets. The Technic parts are common features in UCS already and they do require a higher level of finger dexterity to put together. While 16+ is the recommended age range, I do believe my 11 year old son should be able to put this together with little assistance from me.

Talking about those unique bricks, I do not believe they are unique to this set but they are indeed rare. Here's a few:


I built this over 2 installments of 2.5 hours, sandwiched by a 2-hour "break" on trying to finish off level 13-14 of the LEGO Batman 2 Wii game and a simple lunch. I will strongly advise any builder to do the construction on a flat surface because in some of the steps, the additional bricks were supposed to be placed next to the completed parts and the next step will complete the attachment process. This left some parts loose and difficult to account for.

It was amazing how heavy each of the part weighs. With the weight, the completed parts do feel solid when they were completed. To test this, I have the tendency to toss the parts in my hand and see if anything falls out. Unfortunately, for this set, there were some pieces at the edges that only manage to hang on with only two or three studs. Any slight knock will dislodge them easily. Quite irritating actually.

I have to say I do appreciate the limited use of stickers for this set. They were only applied twice (as huge orange dot) on the wings and once as the sticker label for the specs on the display stand.


To B or not to B?


Not to be. Really. Given the cash that I splashed on this set, I believe I will derive higher level of satisfaction (or 'utility' as some economists defined in their literature) if I spend it on another UCS R2D2. As much as it looks good as a final product, the few design flaws that I pointed above did quash my ratings and good impression a fair bit.


Wednesday, March 20, 2013

Review: 9494 Anakin's Jedi Interceptor


Set ID: 9494 Anakin's Jedi Interceptor
Number of Pieces: 300
Year of Release: 2012
Minifigs: 5
Purchased Price: About SGD 64

The Red Hot Background

The Master-Disciple Duel
Planet of Mustafar. Red hot lava. Feuding relationship boiling over. Bad acting of Hayden Christensen. That's what I can remember of the scene in the finale of Revenge of the Sith. Anakin has just defected to the dark side and committed the hideous massacre of Jedi younglings. Arriving in his green Jedi Interceptor, he even attempted to kill his beloved Pademe only to be stopped by his master, Obi-Wan Kenobi. Cue the epic battle between the master and disciple while trying to avoid being swallowed by the lava fountain on Mustafar. This set should be combined with 8096 Emperor Palpatine's shuttle so that the entire sequence of the battle to the transformation from Anakin to Darth Vader can be played out in totality. 

Some years back, there was another release of this classic battle scene (7257 Ultimate Light Saber duel released in 2005) that was meant more for child play. That set was a total disaster from design to playability to minifigs whereas for this set, I believe, provided a reprieve for LEGO. Sometimes, simple is beautiful.

The Set

This set comes with a well-designed Jedi Interceptor, two 'hovering' droids which Anakin and Obi-Wan used as their surf boards while battling and 5 minifigs. There has been many Jedi Interceptor (and / or starfighter, sorry I can't tell the difference though) released before and I must say the design quality is getting better with each release. This version is, by far, my favourite. The overall design has not really changed much over the years, but upon close examination and during the building process, I could not help but to be amazed by the subtle, yet well intended, improvement made by the LEGO design team.

View from the bottom

The cockpit looks small but fits Anakin nicely. Instead of a backrest, he gets a pair of clip studs behind his seat that can hold his light saber, but not without first dismantling the hilt from the "light". I love the details printed on the bubble canopy, which is hinged to the rear of the cockpit. The Interceptor is protected by a pair of laser guns on each wing and another 2 flick missiles below the right wing. I have to say it is not easy to access the flick missiles from the way they are positioned, but hey, who really plays with those darn missiles anyway?


There are no flick missiles on the left wing because ... the space is taken up by a specially-designed compartment for R2! Yes, R2 finally gets an exclusive seat in a starfighter, without having to fake it by removing his head and attach to the wing. For a vehicle of this size, I can imagine the difficulty in trying to accommodate R2 on the limited space on the wing. This Interceptor does not come with retractable undercarriage so it will rest on the few 2X2 round bricks when not in flight.

The finished product is a joy to look, and to play. This is a rare attribute, given that most lookers (think UCS) are not really playable, while many of the more playable sets are not really eye candies. I even could not help "swooshing" a little with this Interceptor, on the pretense that I need to test it's durability for the sake of writing this review.


The two Mustafar robots are mounted on a number of 2X2 round transparent bricks to simulate the hovering effect above the boiling lava. With limited bricks attributed to them, I have to say they are well designed and look close enough to their movie counterparts.

Building Experience

As an adult builder, I find it more challenging to build the two Lava robots than the Jedi Interceptor, for the sole reason that the numerous small parts in the former are really painful to put together some times. Attaching the flame bricks to the clip proved to be a huge test for my finger's dexterity too.

What's in the box?
As for the Interceptor, building the two wings was not as boring as I initially expected as they are not totally the same, or symmetrical. The holding bay for R2 in the left wing broke the monotony of building a little. There are stickers to be applied to the Interceptor, but appropriately so. These are quite big so pasting them onto the flat surface of the foldable wings was quite a breeze. For once, I keep my sceptic mouth shut on the stickers.

Minifigs

Five minifigs is actually quite a generous gesture by LEGO for a small set like this, although 2 of them are droids. The Battle Droid comes with a maroon torso piece and different left / right arms. This new design came on board only in the last few years to allow the Battle Droid to hold the gun in an upright position. R2D2 doesn't bring along the "wow"s any more. In fact I lost count of how many of R2D2 I have in my entire collection already, not withstanding those that came in the form of key chains, avent calendar etc.

The other three human (not too sure about Nute Gunray though) minifigs are all unique to this set, at least at this current point of time whenI am penning this. Viceroy Nute Gunray's design was spot on. From the robe, to the complexion, LEGO has somehow found the right combination for this minifig. The details on his head gear and robe resembles closely to that in the movie and if there is one thing I must pick on, it will be his leg piece, or 'robe' piece. Too blocky for my liking. Not complaining though.

Anakin's head piece has 2 faces, and both are evidence of his transition to the dark side. Plenty of details on his torso piece, which is also printed on both sides. Not to be outdone, Obi-Wan has to have 2 faces as well. Only very subtle differences separate the 2 so to me, it doesn't matter which side I display him with. I have to say the expressions on these 2 minifigs do look a little "cartoony" to me, which was why I thought this may be a "Clone War" release initially.

Conclusion

Nice Interceptor, which is a good reason to part with your money. Minifig junkies will also love this.