Wednesday, May 23, 2012

Review: 7661 Jedi Starfighter with Hyperdrive Booster Ring


Set ID: 7661 Jedi Starfighter with Hyperdrive Booster Ring
Number of Pieces: 575
Year of Release: 2007
Minifigs: 2
Purchased Price: About SGD104

This is one of the few sets that I bought from Australia when I was working there on ad-hoc assignments in 2008. For some reasons I cannot explain, some of the LEGO sets there were cheaper than that in Singapore. In line with some sales that took place then, the discounted price had made the lugging of this extra baggage much worthwhile.


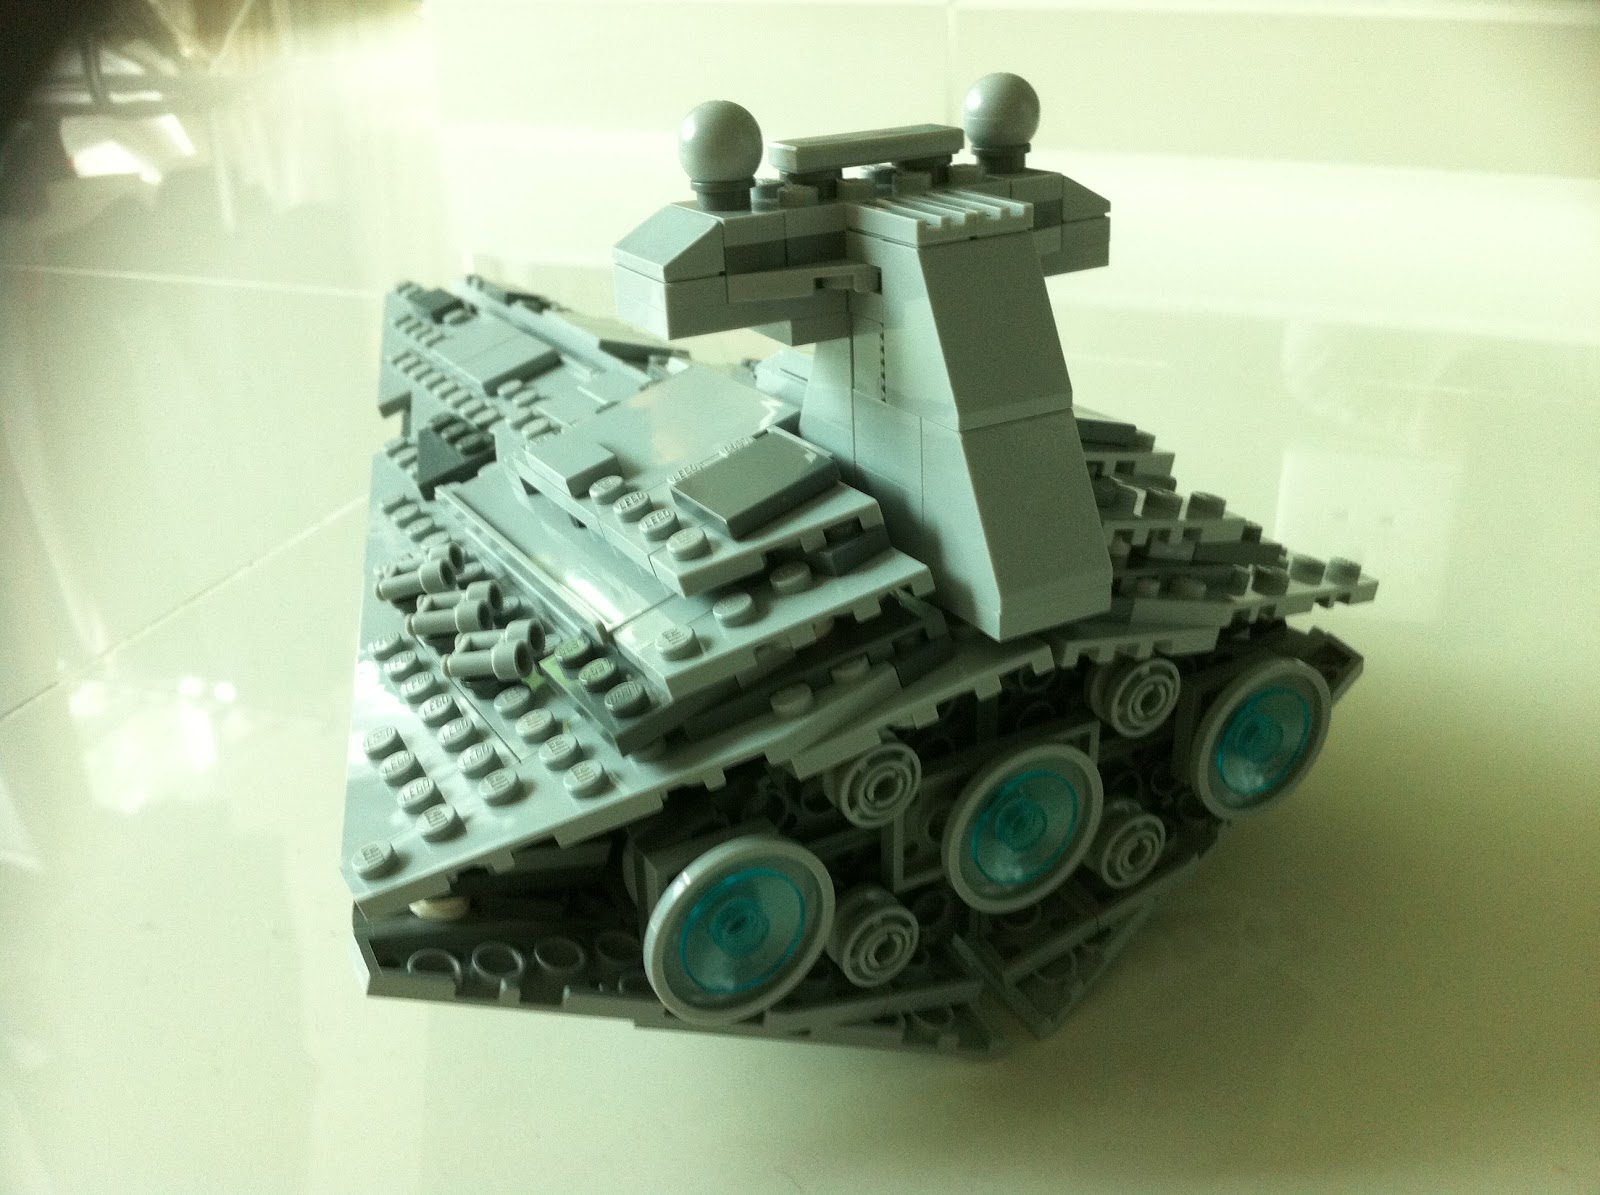
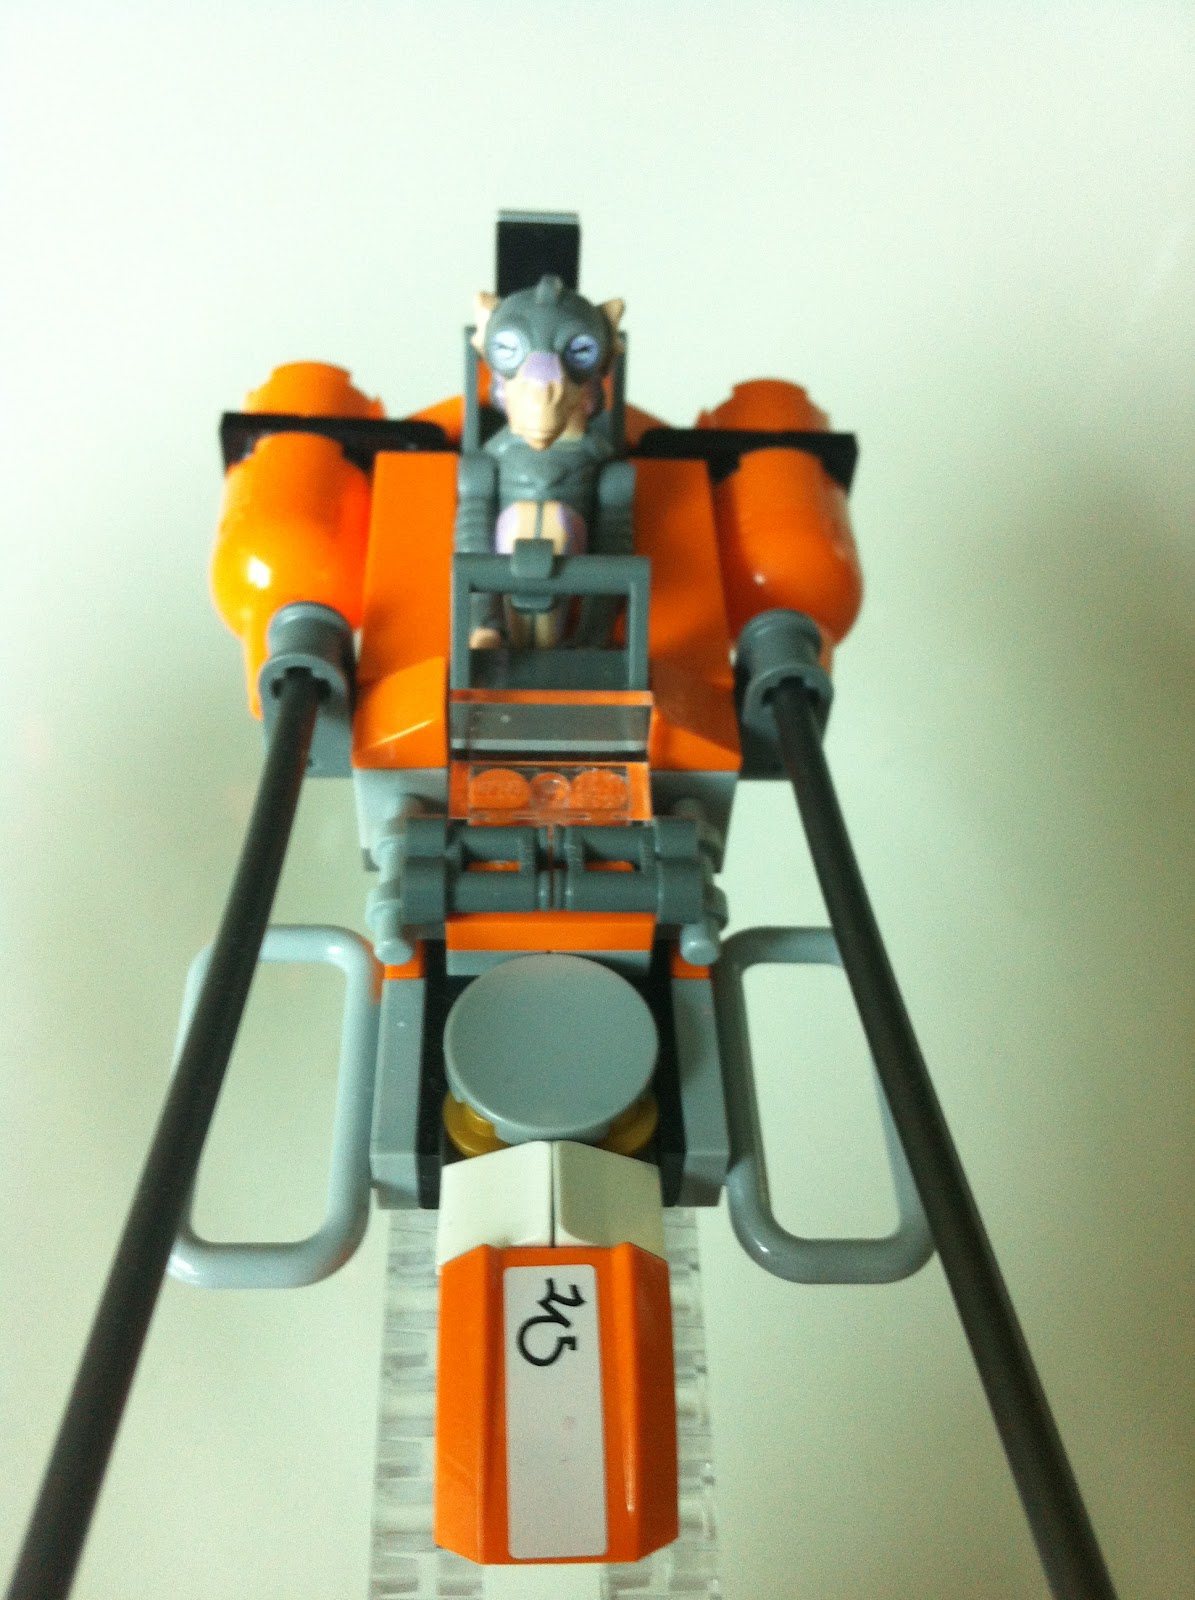
The Jedi Starfighter had appeared in many sets before, albeit in different colours. This is the blue version driven by Obi Wan Kenobi for his mission to Utapau. As the name implies, the booster ring was designed to give the small Starfighter a "push" into hyperdrive as the mechanism was regarded as too large for the minute fuselage (that's strictly my opinion). Although circular in shape, the ring is able to hold the starfighter and stand erected steadily when you put it on display. The Starfighter itself does not score high in the look department, but together with the booster ring, this set now commands the vertical presence that many of the LEGO Star Wars sets lack.


The Starfighter can be mounted easily onto the horizontal stand that spans across the ring. A Y-shape funnel guides the Starfighter onto the stand smoothly as it flies in from behind the ring. Two diagonal bricks then rest on the wings of the Starfighter to complete the docking. 

The Starfighter has a printed (praise the lord!) bubble cockpit to house Obi Wan. Instead of the now-common "staged" hinge, the cockpit can be opened at 90 degree using the loose hinge, i.e.you either keep it 90 degree open, or you close it. There is no in between. An golden brown (nice!) R4-G9 droid accompanies Obi Wan on his mission and resides on the left wing of the Starfighter. Although small, this Starfighter does come with nicely integrated undercarriage that will prove useful when you want to display the Starfighter alone with its wing extensions fully deployed. 

Building Experience

Opening this set after half a decade was quite an exciting experience. Pouring everything on the floor, I immediately had a sense that this is definitely a "old" set. First, the unused stickers have already started to turn yellow (which explains why I did not use them during the construction), and then when I was looking at the packets of bricks, I realised that non of them are numbered! Ladies and gentlemen, welcome to the classic way of building LEGO!!! This is how it has been done in the past, pouring all the bricks out and sieving through them to look for the elusive brick that you want. It certainly is much more painful and time consuming but the fun and euphoria of doing brick treasure hunt is something that has diminished since the introduction of numbered packs. Upon closer examination, some of the blue coloured pegs had also de-coloured, almost making me believe there were two different colours in the same set. Given that this set has never been opened or exposed to elements, it does cast a doubt over the  quality that I often rave about. 

The spine of the booster ring is almost entirely made of technics parts. Building it needs many repetitive steps, many small bricks and much patience. Some steps do require fine motor skills which the younger kids may find challenging. There were many extra bricks left when the set was completed. Knowing that LEGO is seldom too generous with the extra bricks, I revisited all the steps to ascertain that I did not leave any bricks out. Well, I did not. So for once, LEGO's generosity prevails.

Minifigs


This set comes with two minifigs. One is the common Obi Wan Kenobi, and the other is Kit Fisto, another Jedi Master who has a tentacled head. Whilst LEGO uses mostly ABS plastics for almost everything, the head piece of Kit Fisto is one of the rare one that is made with rubber. This allows much of the details of the tentacles to be shown and perhaps keep the cost of producing the head piece low. Interestingly, Kit Fisto's light sabre in this this set has a matte handle, as compared to the more common silver one in the other sets. 

Saturday, May 19, 2012

Review: 10215 Obi Wan's Jedi Starfighter (UCS)


Set ID: 10215 Obi Wan's Jedi Starfighter
Number of Pieces: 676
Year of Release: 2010
Minifigs: none
Purchased Price: About SGD142

Amongst the Star Wars UCS sets that LEGO has released, there were certainly some hits and some misses. To me, this is the latter. In terms of brick counts, this set has the 2nd least number of bricks for UCS set. The honour of the least bricks for UCS set goes to the Naboo Starfighter 10026 released in 2002, but at least that set comes with silver metallic looking bricks, which are quite spectacular. While this set, well, you can be the judge yourself. The only reason why this set qualifies as a UCS set is that it comes with a display stand and a detailed technical specs as seen below. But then again, does the Cloud City set (10123) comes with one?


I did not have the opportunity to put this Starfighter beside the 2002 version (7143) to ascertain what are the key differences between them. For the record, the UCS Jedi Starfighter is 500 bricks more than the its smaller sibling but it is certainly not significantly larger (40 cm). That makes me wonder where those additional bricks go to? The answer lies in the "meatier" wings, integrated with two rather good looking rear blasters. Of course, the longer nose and complex cockpit do contribute to the brick counts too.


Many of the Star Wars vehicle comes with an accompanying droid and this set is of no exception. The droid sits on the left wing and it is featured as a rotating oversized droid head piece mounted to the left wing. In fact, it is so oversized that it does not look proportionate to the entire ship. 

The cockpit is the star feature for me. Plenty of details can be seen here and the pilot seat is an absolute beauty. The clever use of black bricks on the light grey ones makes the seat look very real and comfortable. It even comes with a moveable hear rest for Obi Wan! Only complaint will be the use of stickers to replicate some of the details on both inner sides of the cockpit.
View from the cockpit
A pair of laser cannons can be found on the wings, with another pair found at the bottom side of the wings. With the huge array of bricks that are at the disposal of LEGO, I was amazed how unreal and out-of-place those cannons were designed. I even mistook the bottom laser cannon as a possible undercarriage when I was building it, only to realise that it is a cannon upon construction. 

Building Experience

The bricks come in three bags. One for the body, one for the wings and one for the display stand. No major drama during the construction for this set. The colours of the bricks are very distinctive and you should expect no mistaken identity along the process. One thing that I could not understand in terms of the design though. In order to create the long tapering nose of the Starfighter, the designer has used a massive 20 biege double sided single stud bricks in the spine of the nose. I am sure there are easier and less laborous way of doing this.
When finished, it is no surprise that the weight of the vehicle is skewed towards the rear, given that most of the bricks are congregated here. As a UCS set is never designed for play, it is better off mounting it onto the rotating display stand for appreciation. 


Underside of the Starfighter


Sunday, May 13, 2012

Review: 8097 Slave I


Set ID: 8097 Slave I
Number of Pieces: 573
Year of Release: 2010
Minifigs: 3 (Excluding the carbonite Hans Solo)
Purchased Price: About SGD150

Some LEGO sets are made for play. Some are made for display. This is made for both. Having this Slave I on the shelf will certainly attract some attention from your visitors. For the Star Wars savvy, it is instantly recognisable that this is the ride of Boba Fett. For the non-savvy, this "weird" looking thing certainly warrants some closer examination. Off the shelf, this is one sturdy and well-built set, being able to be held in one hand without the worry of any falling parts.

The Slave I is another of those flying ships that defy all laws of aerodynamics, being able to zip through space vertically despite higher drag coefficient. Ok. I am just being critical. This IS a lovely set. From the designs of the weapon system, to the rotating cockpit that acts with gravity, this Slave I has certainly set a benchmark for the other LEGO Star Wars sets.

This is the 3rd generation version, launched in 2010. Preceding this were two other versions released 5 (6209) and 10 years (7144) before. This is Boba Fett's Slave I and should not be confused with his father's (Jango Fett) version (7153), which is blue-themed as compared to this green one. 


Surprises await!

Loading Han Solo in carbonite
In landing mode, the Slave I can be accessed from the cargo ramp located at the rear tip. This is also probably the best way to display your Slave I unless you have other innovative way to erect it vertically. I tried leaning it against the side of the display shelf but after numerous slipping and waking me up in the middle of the night, I finally decided to leave it in landing mode instead.

Rapid fire missile compartment
Serving as the workhorse of a bounty hunter, this Slave I comes with an arsenal of weapons to carry out its deadly missions. It has four rotating laser cannons at the rear end, two flick missiles in mid-section that can be concealed when not in use, and another four flick missiles just under the cockpit. These last four missiles are the most exciting weapons to me as they can be fired from a cleverly designed button near the undercarriage. What really makes firing these missiles fun is that, unlike conventional LEGO flick missiles which you have to "reload" after each shot, these four missiles can be fired at quick succession, acting like a magazine of four rounds rather than the single shot as seen in the earlier Slave I (6209).


Having said the above, the most challenging part of building this Slave I was also the firing mechanism of the rapid fire missile launcher. There are quite a fair bit of Technics and small LEGO parts used here, requiring some nimble fingers to put them together. Other than that, it was quite a joy to build this set, appreciating all the details that are put into designing all the mechanisms in the fuselage.

This Slave I should also be complimented for the design of its undercarriage. Many a times, this is the most ignored and underrated part of a vehicle, thinking that no one will be bothered with how it looks since it is out of sight most of the time. But for the Slave I, it does fly vertically so the undercarriage will be exposed. As can be seen from the picture, the well placed orange round bricks representing the rear blasters do break the monotony of grey on the undercarriage. One of the orange brick is actually the button of the rapid fire missile launcher. Very stealthily designed indeed!

Minifigs

Strictly speaking, there are only three minifigs that come with this set - a Han Solo, Bassk (a lizard looking Bounty Hunter) and of course, Boba Fett. Bassk's head is unique to this minifig with a lot of details on its face. As for Boba, the battle damaged helmet added more realism to it and it even has a range finder attached (although a little over-sized though).


The Carbonite Han Solo in this set is a beauty, upgraded from the two dimensional versions of earlier designs. the pop-up Han Solo on the carbonite casing comes with an anguish expression that I cannot help smiling at when I first saw it. Great details! The pleasant surprise did not end here. The casing is actually hollow, allowing Han Solo to be clipped inside with the help of two small pegs. Integrated handle bars at both ends also enable Bassk to have better grip when loading Han Solo into Slave I.


Wednesday, May 9, 2012

Review: 7961 Darth Maul's Sith Infiltrator


Set ID: 7961 Darth Maul's Sith Infiltrator
Number of Pieces: 479
Year of Release: 2011
Minifigs: 4
Purchased Price: About SGD110


My favourite view of the Sith Infiltrator
I was wondering what on earth was LEGO trying to create when I first saw the 1st generation Sith Infiltrator (7151) in 1999. Having just watched Episode 1, I was struggling to find any resemblance of that set to any of the vehicle I saw in the movie. Luckily, the Sith Infiltrator has come a long way and this 3rd generation version is a joy to own. My joy lies not in the vehicle, but the accompanying Darth Maul minifig. That probably explains why this set is named "Darth Maul's Sith Infiltrator" instead of the simple "Sith Infiltrator" tagged to the previous two versions - The star in this set is the minifig, not the vehicle. Vehicle wise, my preference will be the sleeker looking 2nd generation version released in 2007 (7663), with more curves and less exposed studs to emulate the breathtaking futuristic Sith Infiltrator seen in the movie.

Move it, baby!

There are many moveable parts in this vehicle. Lifting the tapering nose reveals hidden compartment that house the Probe droids that Darth Maul sent to hunt down Jedi. Also stored here is his mini speeder bike which is simply a U-shape brick with seat and handles. Probe droids can be deployed through releasing a catch at the bottom of the vehicle. Undercarriages are retractable which makes lots of sense in preserving the sleek silhouette of the vehicle in flight. Each wing comes with 2 moveable flaps that can be adjusted to various angles. However, they are best left as C-shape. Making them too vertical and they might pass off as a TIE Fighter with an elongated nose. Darth Maul can access the cockpit from the rear, by lifting the single hinged cockpit door.


Speaking about the cockpit door, I must say it was very well designed and integrate nicely with the shape of the entire cockpit. This seamlessness is evident when I could hardly make out the shape of the door once it is shut. Judging from the size of the cockpit capsule, you can easily imagine 2 minifigs fitting in. However, I guess Darth Maul has a selfish side in him and prefer to have the whole cockpit all by himself. The space inside was tight, with thick bricks lining both sides. These thick bricks made the entire cockpit compartment very dense and therefore heavy, to the extent that the entire ship feels lopsided when you carry it in your hand.

Extremely simple bike

The light sabre has always been the prized possession of a Jedi. It is a dream weapon for many, having a beam of "light" that can slice through almost anything. Having a double sided light sabre just gives the owner the escalated status, and that honour belongs to Darth Maul. It is not without a headache to own such a weapon in LEGO though. How is he going to keep the elongated weapon when he is steering his Sith Infiltrator? Luckily, the cockpit was designed with a special "light sabre storage" that can hold a dismantled light sabre and conceal nicely and securely below the cockpit (see photo on the right). Darth Maul should be happy with this innovation.

Building Experience

Building this Sith Infiltrator is just a matter of putting three parts together - the nose, the cockpit and the wings. Set aside two hours and you will have your finished product. The box states "8-14" for suitable age, I would suggest 6-10.

This set has a fair share of stickers used and by the time I dismantle the it to make space for other sets, some of the stickers have already started curling up and peeling from the bricks. Depending on the humidity that is encapsulating your Sith fighter, I would suggest not applying the stickers when constructing the set. The down side is, they will not be as photogenic.

Minifigs

Here comes the stars of the set - the minifigs. There are four in total. From left: Qui-Gon Jinn, Captain Panaka, Darth Maul and Padme. With each passing year, the prints on the torso of the minifigs get more detailed. The array of colours is also wider to close the gap in realism with the movie characters.

Captain Panaka is the Naboo Head of Security and this minifig makes his only appearance in LEGO series in this set. His peak cap (with an embossed logo) is also unique, unseen in other LEGO sets before. Padme a.k.a. Queen Amidala in disguise, makes a return to LEGO Star Wars set after a long absence. Last seen in 1999, the new Padme now has a flesh coloured head (previously yellow) and ta-da ... two faces! 


Darth Maul comes with two head gears, a black hood and the brand new horns! The latter acts like a mini horned tiara that clips nicely onto the single studed head, giving Darth Maul a much more menacing look as compared to the conventional hood. 


Saturday, May 5, 2012

Review: 8099 Midi-scale Imperial Star Destroyer


Set ID: 8099 Midi-scale Imperial Star Destroyer
Number of Pieces: 423
Year of Release: 2010
Minifigs: 0
Purchased Price: About SGD68

There are a few Star Wars vehicles that I will personally regard as "classic". And by that I meant you can instantaneously recognise the vehicle when you lay eyes on it. Being able to name it will make you a fan, being able to recall which scene it appears in the movie will admit you to the Star Wars Fanatic Hall of Fame. The Imperial Star Destroyer (ISD) is definitely in the league of a "classic". At least to me.

To make a classic Star Wars vehicle easily recognisable in LEGO form is never an easy task, given that they are made of "bricks" and therefore lack the versatility to replicate the original fully. At only about 20 cm in length, it is even more challenging to perform a miracle. An example of a failure was the first generation Sith Infiltrator (7151), while this set, on the other hand, has hit the right note in terms of proportion and details.


A total of three Imperial Star Destroyers (ISD) were produced in the LEGO Star Wars range - The  3000 plus pieces 10030 UCS ISD released in 2002 (What a beauty!), 6211 ISD released in 2006 which is a playable version with the team of minifigs and this. Lacking in size and minifigs, it will still be popular with collectors of tight budget and of limited shelf space. With only 423 pieces, it is almost an impossible mission to recreate the grandeur and details of the ISD. However, kudos to the LEGO designers who manage to pull this off by clever improvisation of standard bricks, e.g. using the binoculars brick for the laser guns on the upper deck.


Building Experience

Opening up the box revealed bagfuls of grey and dark grey bricks. Not a surprise given that these are the theme colours of the ISD. Those of us who build LEGO often enough will know that the colour representation on the instruction manual is hardly spot on. Under dim lighting or reading off a reflection, you can easily mistaken a dark grey bricks with its grey counterpart. Throw a few more black coloured ones and it is enough to drive you nuts. That was the case for me when building this set, misreading a grey 3X2 for a dark grey one. The result? Having to backtrack a fair bit to retrieve the wrong brick. But if you manage to follow the instruction to the T, this is definitely a 1.5 to 2 hour effort.

Basically the building starts with a skeleton in the middle, followed by 4 panels (2 on top and 2 below) of pretty similar proportion. 3 after burners and the iconic T-shape bridge completes the vehicle. The rear burners are fixed onto a diamond shape panel that only loosely fit to the body of the ISD. How loose? They are connected by just 2 studs. Yes, 2. Try not to muddle too much with the rear if you do not want to deal with an 'engine failure'.


The Look

The best way to appreciate the this ISD is to look at it from a short distance away, roughly an arm length. Too close and those studs of the bricks will start to mess with the aesthetic. Too far, well, you will not be able to see some of the details on the ISD. If the ISD is a sandwich, then my favourite view will be to peek at the filling. There is a sense of "organised mess" at this level, with the dark grey bricks seemingly put together in a random fashion but represent somehow a sense of sophistication and advancement of the ship.

This ISD also comes with an integrated inverted T-stand at the bottom and provides a stable frame to display the vehicle. There are also enough details put into the design of the belly, reminding me of the scene when the ISD majestically flew overhead with the camera panning from below it. I did mention that the ISD is a "classic", didn't I?


Wednesday, May 2, 2012

Review: 7962 Anakin's & Sebulba's Podracers


Set ID: 7962 Anakin's & Sebulba's Podracers
Number of Pieces: 810
Year of Release: 2011
Minifigs: 5
Purchased Price: About SGD160

It's about time LEGO improves upon the old podracers. The first LEGO podracers made their first public appearances in 1999, the year when the range was launched. The difference is, at that point of time, you can have three podracers in one box (7171 Mos Espa Podrace) and now you can only have two, minus the Gasgano's podracer. Well, in the movie, it was the battle between Anakin's and Sebulba's podracers that was the classic scene, so I guess we can do without Gasgano's in this collection.

LEGO has not launched any new podracers since 1999, and after a 13 year wait, these new generation podracers do show some important improvements to bring closer the resemblance between the LEGO vehicles and that in the movie. For the uninitiated, a podracer consists of a open top cockpit, towed by two over-sized engines, which in turn are connected by an energised power stream between them (there may be some more sophisticated names for the parts mentioned but I shall leave it simple here). Once powered, the cockpit will be hovering in mid-air, zipping through the podracer track peppered by dangerous natural landscape and deadly alien sabotage. To create this hovering effect and connect the cockpit to the engines, LEGO relied on long biege coloured bricks (24 studs long, no less) in the 1999 sets. Unsightly to say the least, I wished then that LEGO will make those biege bricks disappeared and yet able to replicate a flying podracer. My wish finally came true in 2011. Not completely fulfilled, but close enough. 


Now you see it, now you don't

In place of the long biege bricks, LEGO used transparent long span bricks instead. Perhaps transparent bricks were not invented back in 1999, but they certainly make the new podracers look more sexy and sleek. Upon closer examination, the transparent bricks are actually connected by biege struts. So I guess if there is a future version of podracers, the struts might become transparent too! 

The transparent bricks also extend vertically downwards to form a handle that you can hold snugly should you want to fly the podracers in both your hands. Should this proposal be appealing to you, you might want to note that Sebulba's podracer is quite heavy relative to Anakin's. However, the two podracers are quite well built, with no parts attempting to come off after some simulated barrel rolls and anti-gravitational manuevre. The transparent frame also doubles as display stand, slotting in nicely to a base. Although the podracer feels and looks flimsy on the frame, rest assure that it will take a hard jolt to knock the podracer over. LEGO engineer has done a great job (again) to find the CG of the vehicle and achieve a well balance pose.


Anakin's Podracer

Anakin has a rather simple cockpit, and has more stickers (eight in total) than my liking. Considering that he salvaged parts from the junkyard to customise his podracer, we should not expect a more elaborate design or complex parts. The engines are much more detailed than the 1999 versions, with moveable air brakes and flaps. Building this podracer can be boring too, due to the symmetrical nature of the vehicle and a rather simple engine design. 


Sebulba's Podracer

Being more well off and powerful, Sebulba made up for his lack of physical presence with a podracer of colossal proportion. Perhaps it was this overly inflated ego that led to his downfall towards the end of the race, or maybe size doesn't matter after all (Yah right ...). Surprisingly, this newer version of Sebulba's podracer actually has a simpler cockpit than the original one, and this accentuates the size of the engines. 

The two huge bright orange rotating cylindrical engines remind me a lot of those found on a Boeing airplane, giving a sense of how many horses it might pack if they are real. Well, if they are, Sebulba will probably be cooked in the cockpit, given his proximity to them. More details (and stickers) can be found in the main engines, which are put together by four identical blocks. I have to say I do like the little touch of those golden sticks found in the engine compartment as the do give a "greasy" and metallic feel to the intimidating engines.


Minifigs

With the exception of the Obi-Wan Kenobi minifig, the other four accompanying ones in this set are all non-standard minifigs. Both (kid size) Anakin and Wald have non poseable legs to reflect that they are vertically challenged. Watto and Selbulba now have more vibrant colours as compared to their 1999 counterparts. LEGO will need to have customised mould to make the Wald, Sebulba and Watto minifigs as they are unique to the Star Wars series. Will their presence inflate the price of this set for collector's in the future? Your guess is as good as mine.