Set ID: 7666 Hoth Rebel Base
Number of Pieces: 548
Year of Release: 2007
Minifigs: 7
Purchased Price: About SGD120
 Recently I am in the mood to dig out old sets to build. Perhaps I have made up my mind that I will never sell any of these sets any time in my life time, and I might as well derive more satisfaction building them than to leave them to "appreciate in value" in my store. Knowing that LEGO is going to launch a new Battle of Hoth (75014) later this year, I thought it would be a good time to build and review this 2007 set. I was hardly disappointed, but not without any complaints.
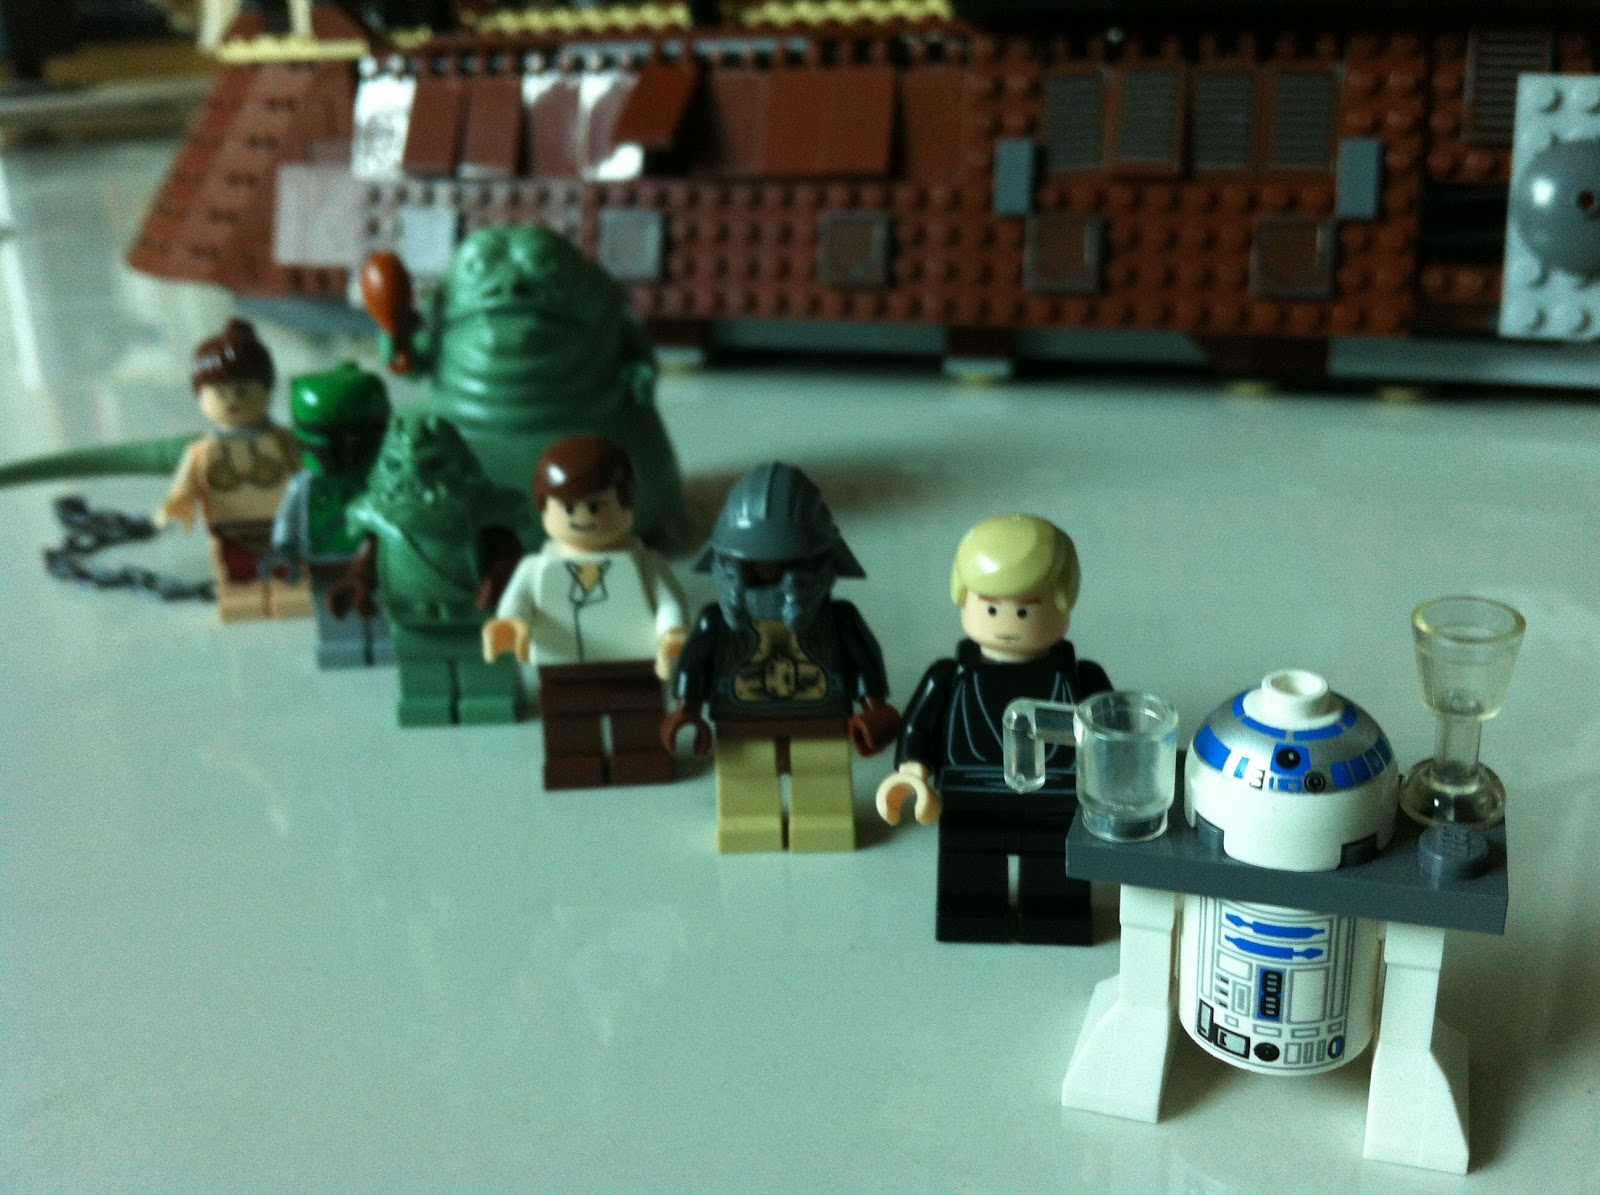
There have been quite a number of sets released before on the theme of Hoth, most recently being the Hoth Echo Base (7879) and Hoth Wampa Cave (8089). Should you have a couple of the AT-ATs and Snow trooper or Rebel Battle Packs, you can easily re-create the epic battle scene in the movie. I have to say taking photographs of scene sets is usually more interesting than a vehicle set because of the many ways to pose the various elements and minifigs. With the number of photos I have posted here, I hope to do justice to that cause.


There are so many elements in this set that I think are worth spending some time to introduce and review them. Not all are of my liking but some have been improved in the later versions released. It is not fair to judge some of the design flaws harshly, considering that this was release some 6-7 years ago. Since then LEGO has taken on board many of the feedback from fans and made the necessary changes. LEt's do a head count first ... For SGD120, I get a Echo Base with big sliding door and small command centre, a turret gun, a e-web blaster, a probot, a maintenance crane, a snowspeeder and 7 minifigs! Quantity wise, definitely a worthy set!
The Base


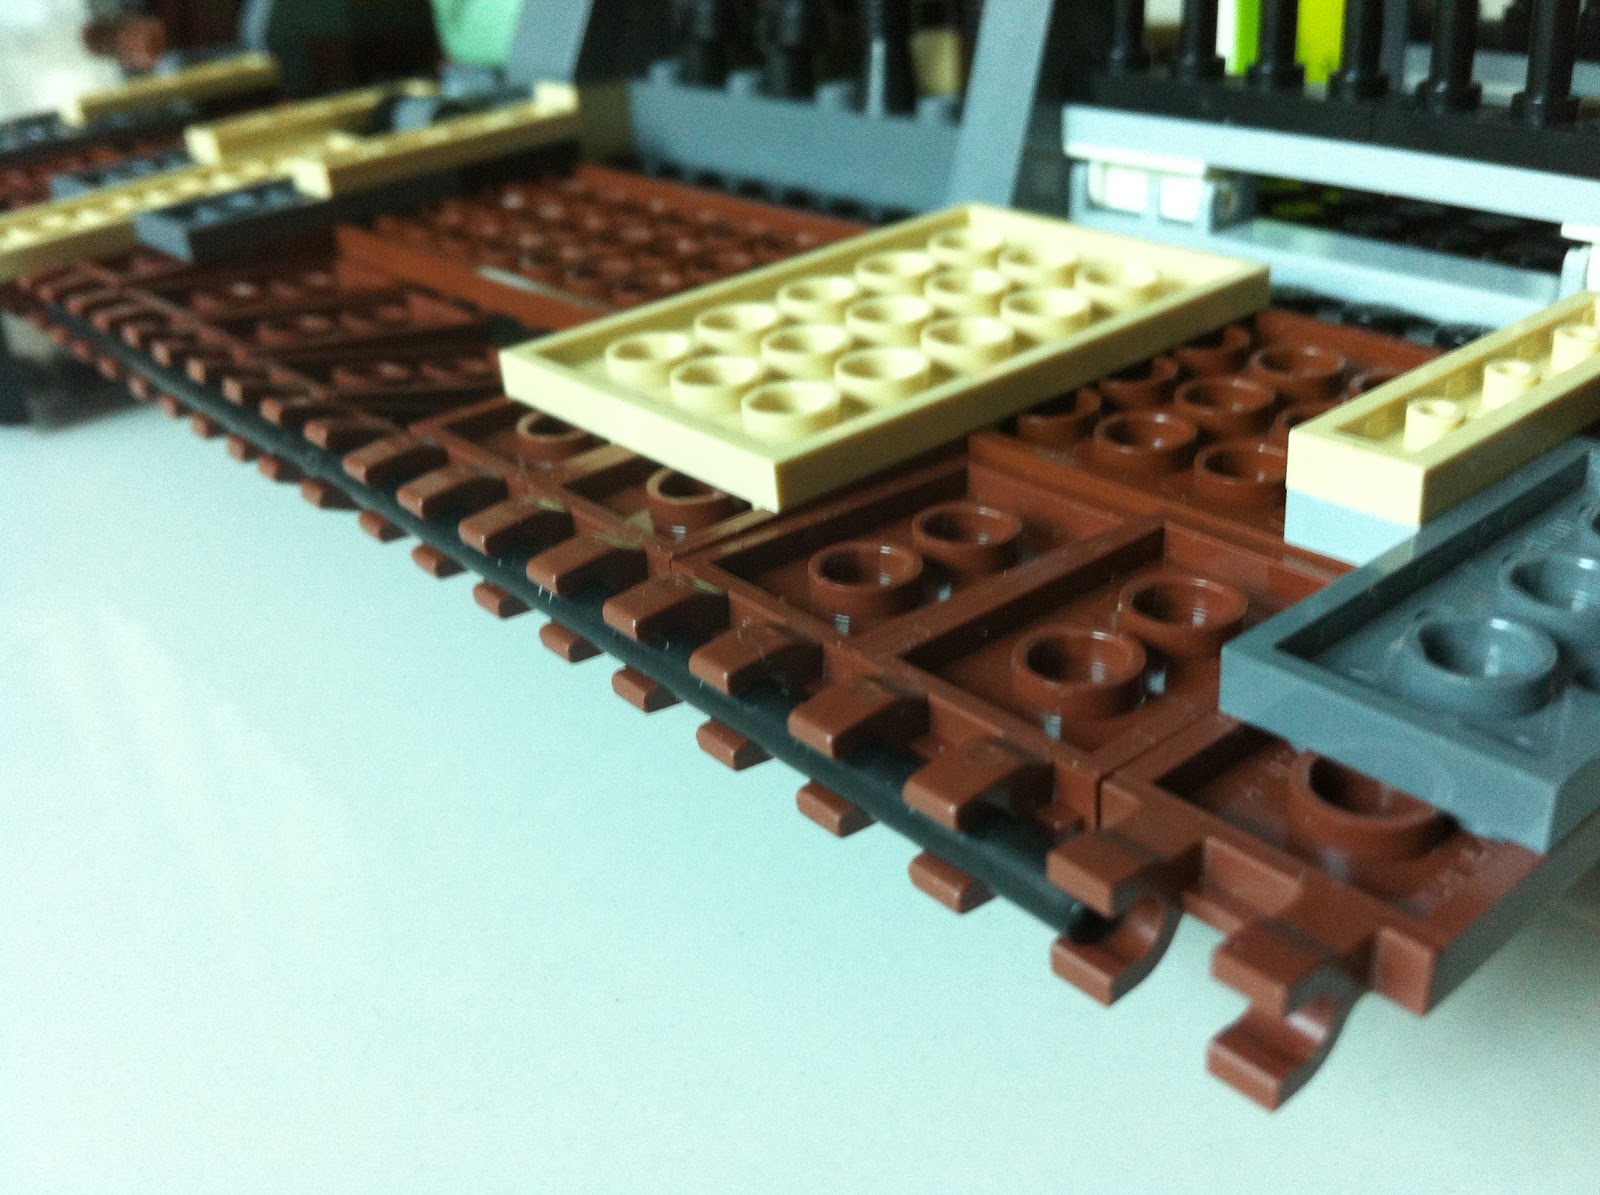
Let's start from the Base. There are 3 segments in the Base, the middle and biggest segment is the main entrance with huge sliding doors. Instead of the boring vertical line, the base doors has a jagged closing profile. They open up easily with 2 turning knobs situation at the top of the entrance and the doors slide open / close effortlessly. My excitement of the door design was slightly dampened when I noticed the small gaps when the doors are shut, arising from the protruding studs. This can actually be overcome easily with some additional grey 2X1 SNOT (Studs Not On Top) bricks and the closing profile will be much tidier.
I have to say I LOVE the two customised bricks that are used to represent the snow capped entrance on both sides of the door. I am pretty sure the brick is not unique to this set but the paint work is exclusive! On the white base colour, the designer "splashed" a tinge of light blue paint on it randomly to create different patterns of snow and ice on both bricks. The randomness gives the finished product a very natural look especially if you look at it from a distance. Nice job LEGO!


Hinged on both sides of the base are the command centre and maintenance bay. The command centre is simply designed with 2 large panels with "radar" stickers. Upon closer examination, the 2 stickers actually make up one large radar screen design if you put them side by side. Nice touch! The maintenance bay is used to elevate the snowspeeder when it comes in for repair. The dock is designed in such a way that it will hold the protruding 4X2 bricks at the bottom of the snowspeeder snugly when it rest on the dock. The snowspeeder does balance very well on the dock, with the centre of gravity accurately located in the middle, preventing the snowspeeder from tipping over. A simple crane is included as part of the maintenance team. It comes with a 2X1 brick that is designed to lift the engine compartment of the snowspeeder up. There is no exclusive minifig included to operate this crane so you will have to convince one of your rebel trooper to do it, sans his backpack as it will be in the way of the seat on the crane.
The Snowspeeder


The peripherals
The probot (probe robot) is mounted on a transparent strut and I must say, very well designed. Very simple but able to bring across the key characteristics of one. Can't say the same for the turret gun though. In this design, the long main gun looks a little out of proportion. The laser firing mechanism located at the sides also broke the round silhouette of the rotating canopy. Talking about the lasers, they are only loosely slotted into the rotating canopy and are ejected with a push of the firing mechanisms (innovative design!). However, as there is nothing to hold the lasers in place, they tend to slip out easily when you tilt the turret gun. Do keep a lookout for them as the blue laser strut brick can go missing after a session of Hoth Battle play time. I do like the e-web guns. But similar to the turret gun, the red laser struts here are also not secured on the side of the gun and slipped out almost every time I carry the gun around. Will certainly be better if the lasers are clipped on rather slip in.
The Base


 |
| Gaps ... |
I have to say I LOVE the two customised bricks that are used to represent the snow capped entrance on both sides of the door. I am pretty sure the brick is not unique to this set but the paint work is exclusive! On the white base colour, the designer "splashed" a tinge of light blue paint on it randomly to create different patterns of snow and ice on both bricks. The randomness gives the finished product a very natural look especially if you look at it from a distance. Nice job LEGO!


 |
| Crane at work |
The Snowspeeder
 |
| Back to back pilots |
The snowspeeder in this set is very sturdy and playable. The size is also ideal to be held in one hand. Both pilots are able to access the cockpit via the transparent canopy, hinged at the rear of the snowspeeder. Only the front facing pilot (Luke) has a control panel and there is an obvious absence of steering mechanism for both pilots! Wonder what the rear-facing pilot does then, other than being a dead weight. Both pilots will also have to lean back slightly in order to close the canopy tightly. The engine compartments on the wings can be removed for maintenance, revealing the details of the engine mechanism, represented by a well-printed sticker. Personally I will like to see a tinge of orange on the external design (as seen in 8089 Hoth Wampa Cave) as this snowspeeder looks a little hmmm... unadventurous, on the outside.


 |
| Evolution of the turret gun, the one on the right is found in this set. |
The probot (probe robot) is mounted on a transparent strut and I must say, very well designed. Very simple but able to bring across the key characteristics of one. Can't say the same for the turret gun though. In this design, the long main gun looks a little out of proportion. The laser firing mechanism located at the sides also broke the round silhouette of the rotating canopy. Talking about the lasers, they are only loosely slotted into the rotating canopy and are ejected with a push of the firing mechanisms (innovative design!). However, as there is nothing to hold the lasers in place, they tend to slip out easily when you tilt the turret gun. Do keep a lookout for them as the blue laser strut brick can go missing after a session of Hoth Battle play time. I do like the e-web guns. But similar to the turret gun, the red laser struts here are also not secured on the side of the gun and slipped out almost every time I carry the gun around. Will certainly be better if the lasers are clipped on rather slip in.


Building Experience

I always hate the threading of strings so the construction of the winch took me some time. With large hands and failing eyesight, I may need to depend on my kids' assistance in the future sets. Stickers are used in a few places and I have to confess that I did not do a good job for this set. Part of the sticker sheet has already "yellowed" due to the long storage. This led me to believe that the situation will be worse if I open any pre-2005 sets in my collection. Fingers crossed.

There was a page in the instruction manual that brought a smile on my face (Pg. 58). As shown in the photo here, the instruction reminds the builder repeatedly NOT to tilt the brick the wrong way and it is quite interesting how the instruction tried to bring that point across ... "not this, not this, not this, BUT this" way ... LOL. There is a good reason to get this step right though, as a wrong tilt will make the firing mechanism non functional. Thanks for the reminder.
An hour and 45 minutes is all it took for me to finish the building. Can be shorter if I spend less them appreciating the various elements whenever I finished building one.
Minifigs
 The box art design here emphasises that this is a "Limited Edition". I guess part of the reason is due to the exclusive K-3PO minifig in this set. Well, he is the white cousin of C-3PO and blends in very well with the surrounding snow and ice. Having said that, his torso design (both sides, nice!) is a little different from that of C-3PO.
Luke has quite a funny looking nonchalant expression on his face while his co-pilot, Dack Ralter, has the more traditional LEGO smiley face. Although it lacks some details of the newer minifig head pieces, somehow these trademark smiley faces do subtlely remind me that this is still a LEGO toy, and not to forget the fun part of it. Both pilots share the same torso design, with the printing only limited to the front.


2 very friendly looking Rebel Troopers are included here. I placed one beside the 7749 (released in 2009) Rebel Trooper and noticed only the goggles have been changed. The helmets of the Snowtrooper are integrated with the backpack so do not expect to pose them with their heads turned.


That reminds me, I have ran out of display space on my shelf to accommodate this set. Will now need to make a painful decision on which one to dismantle ...